Showing posts with label works in progress. Show all posts

Saturday, February 16, 2013

Working the leftovers!

Finally cleaned up my brushes today and separated my findings from the ribbons in the craft cupboard. Later, I was debating on the viability of some of the one year old clay in the claybox. It looked like some were still usable - like Grace and Hearty (which I liberally mummified with tape and more tape a year ago) and such - though what was left of the lump of Cosmos hardened even within its packaging.


Pulled out one of the older ochre Grace clay stick to mix. There was no mixing chart for Grace on the new Padico clayscale I got from BFJ (http://www.bestfromjapan.com/moreinfo.cfm/users/mylist.cfm?product_id=867&actioncode=add) so I just went along with a rough gauge. (Makes me all more determined to get a set of Modena colours just to play - but I do have to finish up all the year-old clay first). Love the pick that comes with the new version - it has a sharp tip and a flattened end; extremely useful!


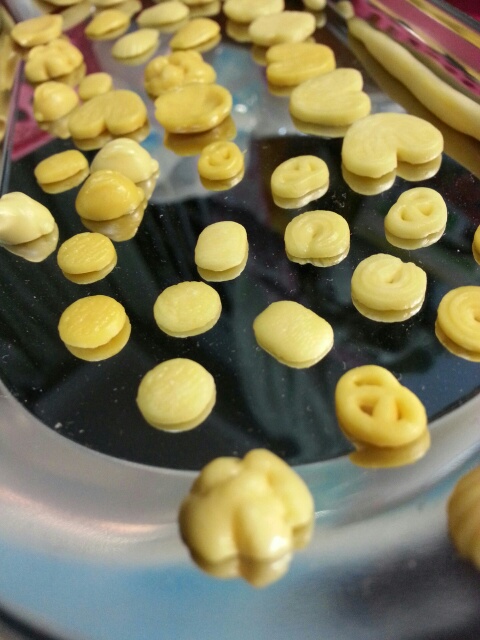
The menu this evening was anything small and baked and a batch of macarons. What more could you ask out of year old clay! These should be dry overnight in cool air-conditioning for coloring tomorrow.
 
Decided to try the clay release master from Tamiya on my molds - you can just use baby oil on a budget. There is no marked difference except you get a bonus facial on your fingers since you would be getting baby oil on your skin. The Tamiya version comes in a nail polish sized bottle with its own brush. One small difference was the longer time the oil stayed in the mold. With the Padico and brandless ones,  the oils dry up quickly. This retails locally for $6 a piece. If your local Tamiya supplier do not have this, visit Stargex at Paya Lebar if you're in Singapore and you should be able to find lots of products from the Tamiya Decoration Series as well as this item at the store.
 
Since my workspace has shrunk to half a table after some living arrangement changes, I have swapped to using a mini standing magnifying glass instead. But its still tiring to look at small stuff when it gets later into the night. I'm still trying to work on my scales (though most of the time, it ended up being a "feeling" thing aka it does not feel right). Maybe it's time to find a niche area that does not demand too much of scaling ._.
 

Monday, February 11, 2013

Hiatus is Over!

After a very long hiatus (lots of movement and changes in real life) I am back informally to my crafting hobby again and feeling great about it.
 
I have re-arranged a lot of materials and thrown away more sadly - since clay do dry up into unusable chunks after a whole year. But nevertheless I do have some new starting packs to work with.
Here is a sneak peek at the newly arranged craft drawers!
 

Monday, April 19, 2010

"Ikura" From Silica Gel and Coloring Resin Clay

I opened up the packet of silica gel last night and was feeling brave enough to attempt to color a batch of my own. The packet I obtained from Daiso contained mostly clear gel beads and I used a bit of Tamiya Clear X-27 Red to dye the beads. I poured enough beads to cover one layer of the small sauce cup I was using to dye them and enough paint to just stain a thin layer of the bottom of the cup.

Didn't take any process photos since I was expecting a failure since the paint or the beads may clump or just chip off or it might not stick properly to the gel beads.

I was unexpectedly treated to a surprise after the beads dried.


The gel beads are not all same in size so some are very very tiny, like microbeads, which others are large. I left the clumped beads to dry on their own and then ''unclumped'' these by pressing them between my fingertips. Three to four of the beads broke on impact in fact -- maybe there was some strange reaction between the paint and the beads (I have no idea...) But most of them were nicely and evenly colored. ^^

The other thing I accomplished tonight was to try out a couple of new paint mediums on Grace Clay. Unexpectedly, a few small drops to and fro was able to make these tiny lumps of clay achieve a brilliant and deep, or a light and delicate color. (No - they aren't expensive paints!) I made mostly fruit colored lumps for use in the danishes later.


Wish I had made rainbow colours indeed -- but I will have kind of no use for the blues eh ^^;

Sunday, April 18, 2010

Inspiration Danishes

After an onslaught of danishes by Snowfern, I was inspired to make a load of my own and some other sweet pastries too. These were molded from a couple of 1:6 pastry master molds made with Alley Goop. (I used Re-Ment miniatures to make the base and further modified it since most of the Re-Ment pastries have fruit or frosting on them) It was the first time I am using Alley Goop and I must say - this stuff works much better than the purple x white molding material I got from a Japan-based hobby shop.


The usual round danishes, bear claws, beignets (not exactly a danish but they are good!) and cinnamon swirls. (the clay is air-dry clay, a combination of 2/3 Hearty Soft White and 1/3 Grace Clay. I have used a mixture of ochre and naple yellow watercolors and FolkArt ButterCup Acrylic Paint)


Pastry with a latticed top


Danish Twists.

These would probably be great with any 1:6 scale dolls - probably the child BJDs or end up as mini-pastries if you are using these for a 1:4 or 1:3 doll. I'll get these painted tomorrow after they have dried and shrunk - these things need at least 24 hours of drying before I paint on them!

Sunday, March 21, 2010

Papercraft Patisserie Cafe Work in Progress

The paper doll-house dioramas from Sanwa Paper Co. caught my eye a long time ago but I just did not conjure up enough patience to sit down and in fact work my way through 14 pages of printed templates to get one done. But I managed to finish half of the patisserie cafe set today.

In the process of attaching the base to the walls. I used tacky glue for the base and realized that was a bad mistake. Because tacky glue is extremely "wet" and takes time to dry. It puckered up the paper and gave it soggy spots.

The rest of the cafe was attached using Beacon's fast-grab glue so no more soggy spots there-after.


Putting the inner cupboard together with glue. This cupboard is a lot of cutting work - especially the curved edges.


The assortment of tools used in this venture - craft knife, pen knife, tweezers, two sets of rulers and a scorer. The basic scrapbooking equipment. :)


Here's a half-completed set-up. There's still more miniature folding to go. But as you can see, the papers that I have used are very strong and it holds up all that ceramic plates and glass, along with the miniature air-dry clay food. More cutting and folding tomorrow!

Monday, March 15, 2010

Vacation Projects. Time Check. Hobby Check

After working hard for two weeks, I finally get a breather! A week of rest - or rather indirect rest (Since I will still have to be finishing up a lot of administration on the side.) Over the past month, I have been making a lot of little parts and wondering how in the world am I going to make use of them -- I suppose they will all be turned into board-magnets and scrapbook embellishments since most of them are ranging between a scale of 1:6 to 1:4.

It's been roughly 3 months since I started working on clay miniatures. The returns have so far been fulfiling. I feel like my time is better abused, I have made a few more friends and I have got myself some pretty resin (aka Miss Julia) to indulge in.
I am hoping to finish up these old fashioned donuts today, along with the cruellers and twisted churro rolls in 1:4 scale and make some paper bags for them.


The other project this week is the CBC Challenge : Waffles. Here's a start-stack that I need to work on. Probably I will be adding some Belgian waffles to the mix.


Little Note :
I have cleared up the materials I bought to start on sewing doll clothing and other accessories for my resin indulgence. They are all snug in my bedroom's shelves now, away from the strong-smelling paints and varnishes are stored in my study (where I work on my miniatures). Miss Julia looks extremely tired after helping to clear away the fabrics for her new dresses and she has plopped onto her armchair with some green tea to relax. I doubt I will be writing about doll matters and sewing forays in this blog. There would most likely be a new one up once I get to it.

Saturday, February 27, 2010

Cream Clay Piping Practice and Icing Tips

Did a little piping practice today. I had failed a lot previously with piping when I was using plastic nozzles. I wasn't very good either with the sillicon deco tube either -- plastic nozzles were hard to handle. With that in mind, I headed off to our local baking supplies shop and grabbed the tiniest Wilton icing tips available, which are coincidentally metal.

Miniature piping bags can be hand-made using small plastic sachets and curling a stretch of "foil teeth" from a aluminium foil or plastic wrap box. Yoyo Studio's tutorial is one of the more well-known ones to teach clay cream piping.

The difference between hand-made nozzles for miniatures and icing tips is simply -- clay wastage. Icing tips are larger and you will have a bit of clay left over after finishing whatever you have in the bag. For the miniature foil nozzles, you reduce on clay wastage.

If you aren't that nit-picky on the clay and if you're fat-fingered like I am who can't curl a length of foil teeth for nuts, just stock up on Wilton icing tips with the smallest number for the series.


These were done with a Wilton Open Star Tip 13 and a normal plastic piping bag which I cut into half since I didn't need such a big bag. Make sure you tape the plastic bag to your icing tip as it can move and mess up your piping.  You probably can get a vague idea of the tip-size with this link. I used pure Grace Soft White Cream Clay. If you are not sure how to handle a piping-bag, Google turns up a few good tutorials like 1M Swirl Cupcake Icing tutorial one on Wilton's own site.

You can also make a soft cream-like clay that can be piped easily by soaking pieces of air-dry clay in water along with talcum powder. Use enough water to soften the clay to a mushy texture but don't over-soak it else you will take a very long time to get it back to a drier state. Use acrylic colors to mix in if you want to get an opaque feel to your prepared cream.


More pictures of what I did with the rest of the cream clay. I worked with a few methods of swirling on the cupcakes made a few days ago.


Piped some cream into a few raw-looking tartlet bases. The metal tip makes it very easy to use. If you have been attempting with plastic icing tips, the tip will not be able to 'cut' and release the clay well. The larger piping bag is easy to hold and use for people with a not too steady grip. :)

Tuesday, February 9, 2010

Photo in a Studio

It so happens that I take a lot of shots at night of works in progress and relying on just my overhead lamp gives every photo I take a horrible edge-y glare. So I purchased a photo in a studio set using some of the birthday money hubby sent over -- well paid for a bit of it, so that I can dump a bit of investment into macro-photography. Costs around $100+ SGD with shipping thrown in.


I set it on top of the large cabinet perpendicular to the study wall. The lamps get very hot every time I did at least a 10 minutes plus shot - and I nearly fried a finger because I touched the casing near the bulb. I am stll kind of newbish at setting up the lighting and whatnot, but the nub shot I took of some of my miniatures tonight turned out alright :


Very-large madeleines, 2cm in length and a bowl of small strawberries.

Tuesday, February 2, 2010

February's Work in Progress

This month, I am still working on a large array of French-style sweets and pastries. The amount of work put in to these tiny things is so immense. Apart from just working clay alone, it hit me that miniature making is not just about clay. I guess I was a tad too naive and did not realize that this hobby would carve a huge hole in the melon for me. Here's a brief scan of what I have so far :


Anyway, I did chocolate-stripped strawberries in dark and white chocolate and after finishing with it, I realized that the bag I used for piping had too big a hole and so it made huge flat stripes instead of the frilly thin ones I would had liked.


Looks more like zebra-berry, than something romantic. *sigh*


The choux cream puffs are also part of the selection of simple French sweets in my list to do for this month. Soon to be assembled and dusted with sugar and chocolate.

Saturday, January 23, 2010

Strawberries and Cream

I usually spend the early part of the day or the later part of the night making creams and frosting in little sauce boxes used by sushi stores for their soy sauce. The colors for all the creams are mixed by hand and mostly, again eye-balled with a reference pic somewhere. It gets hard sometimes when the color you want isn't there!

So anyway.

Here's the row of pink and red frosting done for the Valentine's Day project.


(You can also see how tight my workspace is, I really need to buy that trolley we were discussing this morning too! (Asuka has one *jealous*) Colors are based from Folkart Acrylics, just about the cheapest bottles of A-paints I can find here and with the largest range.

Recently there has been a strawberry craze by someone, and I ended up putting together some last night too. You can see a peep of them in the same photograph on top.


The strawberry family. Once I varnish these and seal, they get a nice little dip. I'll take more photographs of that later!

Weekend. Time to head out for some retail therapy and run errands. :)

Saturday, January 16, 2010

My First Macaroons

I've finished over the week, the parts needed for assembling mini-sweets themed stationery items for a charity bazaar in early March (I think). The variety includes a bunch of cookies, frosted, jam-med; two kinds of tarts; blueberry and strawberry with cream, and a couple of macaroons which was supposed to be a mistake but it worked anyway.

 They became my first macaroons. *hah*


They were supposed to be pink frosting for another batch of five cookies and it ended up that the light red Grace I saved dried to a partially-plastic consistency. So I added more wet Grace, mushed it up, added some more pink and made macaroons. They still look very rough-y around the edges, probably the fact being my poking tool isn't thin enough and the clay was hardening by the second! I'm still not good with sizes yet and most of the macaroons are eyeballed -- so most of them range around 1cm in width.

I will attempt another round of macaroons again when I pop out a new batch of Grace. :)


These tarts are not to doll-house sizes. They look slightly exaggerated due to the fact they are going to be stationery products -- like what I mentioned above. I am assuming many people would buy something that looks pretty and is useful, rather than it just looks pretty; unless they are a miniature collector.

Time to head out since it's Saturday, and go about the craft shops to get some produce. :)~

Monday, January 11, 2010

Weekend Prep


I spent the Sunday working on prep items eventually for the cookies and tart bases that I have made on Friday night. Since air-dry clay requires, *cough* air-drying -- I have to wait for one to two days of open air drying  before the creations are dry enough to be painted.


I didn't bother to paint the larger strawberries I made, those I will do over the week to make chocolate-dipped strawberries. Instead I painted the smaller ones that will go into the tartlettes. Those green things you see in the blurred background are .... slices of kiwi fruit! But I think I made them a tad too thick, they look odd after painting. *sigh*

Apart from strawberries, I made a mountain of blueberries. Not exactly mountain, but you get the idea :


The other tart decoration I have made are gold-flecked chocolate slices. Rolled out Grace Clay dries into a consistency like flexible plastic and it cuts quite easily too with a sharp art cutter.


 This slab of chocolate was dried out on a plastic sheet the night before. I use a stencil brush to dab gold acrylic over lightly.


Here's the result. Let the paint dry; usually it is quick and then you can start cutting into squares, circles, ovals, whatever pleases you.

As for the cookies that I have showed you in the other post on Wood Formo, I have painted them - these will dry overnight again so they reach maximum shrinkage, and then decorated.


Friday, January 8, 2010

Graham Cookie Crust with Padico's Wood Formo

A french tart / graham cookie dough-like clay can usually be achieved by adding ground bits of dark brown spices, e.g. ground cloves, allspice or black pepper to a pre-colored clay. But with that comes the pungent spice-y scents too, that does not, sadly exist in real cookies and tart crusts!

You can get around that by using Wood Formo; a kind of air dry clay product by Padico. Wood Formo is usually used for model-crafting and sculpting. It is very very moist, so moist that it produces water vapor within the package when the weather gets a bit warmer. :\

Mix around 1/5 of Wood Formo with 2/5 of Grace Clay and 2/5 of Hearty Soft, white-base. If you want a darker brown clay, omit the hearty soft, and use 1/3 Wood Formo and 2/3 Grace. Wood Formo by itself dries up to look like, well, you guess it! So you wouldn't want a woody looking cookie or tart base.


Wood Formo + Grace Clay                                               


Wood Formo + Grace Clay + Hearty-Soft

It is still very sticky to work with, and most likely you will end up getting strands of rebellious clay all over your fingers. Once you get the consistency and color you want, "ball" the clay into your palm and use your palms to fold and round it up. Avoid touching your clay-ed fingers to it and after which just wash and scrub all the residue on your fingers. It's best to allow the lump to stand outside for a while to let the moisture dry off so its workable - but not too long!


 A range of cookies made from the mixed Wood Formo clay. Let dry for a day or overnight on plastic sheets. Make sure you flip the cookies to let the bottom dry as well. Moisture tends to collect a lot at the bottom of these. I will probably have a post on coloring these once they have dried. :)


Saturday, January 2, 2010

Berries and Almonds

Worked with Grace Clay for the first time. It has a lovely, pale-white translucent color and very easy on the hands to mold until -- you add acrylic colors to it; then it turns mushy and almost to the texture of melted marshmallow. Terrible to mix but if you continue at it, you will be rewarded with wonderful results. Then you have to work quickly as Grace Clay tends towards fast loss of moisture and end up having a texture of drying paper clay. Made a couple of raspberries and almonds using Grace; as well as strawberry leaves and slices.


I managed to finish up all the rest of the Hearty Soft clay, the last bit of tea-brown was used to make tiny eclairs. I used a mold from a used "Panadol" pack to press out the eclairs and texture it.

Next to figure out how to arrange all the fruits and nuts onto the cookies. I will probably be making a few chocolate slices too.
 

Wednesday, December 30, 2009

Blueberry Tartlette and Cream Donuts, and New Year WIP

Completed the tartlettes and donuts I set out to make over the X'mas and Boxing Day stretch. They don't really look like anything sold in shops or really adhere to the real items though. After some deep thought, I realized I liked Deco-style more rather than making miniatures look like the real thing -- although that's a challenge to do, but I would like to create pretty gifts too.


Blueberry Tartlettes and donuts selection.

So, New Year's work in progress :


Sand-cookies; strawberries and you've guessed it, lots of whip cream to come.

Saturday, December 26, 2009

Christmas Day Works in Progress

Opened up a small pack of white Hearty Soft that I purchased in Tokyu Hands on Christmas Eve. The last time I've worked with clay was ten years ago, when I was making doll figurines using La Doll. Air-dry clay feels strange to handle for the first time, almost a little out-of-control feel since it is so light and mushy. After a while of conditioning it and getting used to the texture, it became fine to handle.

Hearty Soft took well to acrylic paints, I used Daler-Rowney for now since they had a new savers pack of 12 colors for $8.99. You can get it at Art Friends, Singapore. But since H.S. is a white-based clay, the colors that were mixed in becomes pastel-macaroon light, so you have to darken it with additional paints and pastels. I would try mixing in Folkart Acrylic paints and see how the color goes next time.

I managed to turn out a couple of doughnuts and some tarts. Decided to also make some blueberries, leaves, white and dark chocolate flowers as well as vanilla and caramel buttons to go along with the pastries.


Not too bad for a starter attempt at air-dry clay, I guess.